Monday, May 20, 2013

Let's Add a Little Whimsy to Your Garden...


Hey Everyone! This week I decided to do another blog on a Pinterest-inspired idea: The Fairy Garden.
If you’ve spent any time at all in the Gardening section on Pinterest, you have seen the Fairy Garden trend take flight…

 And with so many grand examples of a Fairy Gardens to inspire and intimidate, I thought it would be a good idea to illustrate how easy and fun it can be to create your own.

Step 1:
The first thing you’ll need to come up with is a pot or base of some kind. I’ve decided to go with light-weight terracotta imitation pot. It has a lovely design that contributes to the overall look I’m going for, yet the plastic material will make it easy to move around if I so desire. I want something a little smaller, so my pot is about 18 inches in diameter and about 8 inches deep. But as you can see from the pins I’ve gathered, any pot can be transformed into a Fairy Garden (even a bird bath).

*Note* if you select a pot that is without drainage holes, do not fret. A thin layer of marbles, stones, or clay pebbles at the bottom of your container should provide sufficient drainage.

Step 2:
Next, go ahead and pile some dirt into your container. I have attempted to create a tri-level effect with my soil, but as the garden unfolds my levels will shift dramatically, so don’t focus too heavily on that.


 Step 3:
Here comes the fun part: plant selection! First, it’s best to decide where you plan to place your Fairy Garden. Knowing this will mean knowing your light requirements. Since my garden will live in part-shade, part-sun, I’m looking for plants that will be happy in both.
So, with light requirements in mind, the first plant to choose is the one that speaks to you. The first plant I am selecting is a Ginseng Ficus Bonsai Tree.

This tiny tree seems sooo appropriate for a Fairy Garden, I couldn't resist. Next, I chose Begonias, Veronica Sunshine, Coleus, and a really neat Rex Begonia.


I’ve tried to pick a variation of plants that will help create the illusion of a mini garden. The Ficus will function as my tree, the Begonias will act as my flowers, the Coleus is intended to resemble shrubbery, and the Veronica Sunshine will be a ground cover.

Step 4:
And so begins the situating! After you’ve gathered all of your possible plants, it’s time to begin placing them. First, begin with your foundations. In this case, my foundations are the Ginseng Ficus and the Rex Begonia. I want these two items to be the highest points in my garden. This will help create the look of natural terrain. After you decide where to place your foundations, go ahead and add your filler (in my case, this is my Coleus/shrubbery). I have placed my filler close to my foundation pieces in the hopes of creating a cascading effect. Finally, place your flowers and trailer/groundcover.


Once you are satisfied with your placement, go ahead and plant!

*Note* don’t feel as if placement is a permanent thing. Just because you envisioned a certain plant going in a certain place doesn't mean it will. I played around with placement for quite some time, and I ended up with something very different from what I had envisioned.

Step 5:
So your garden is planted and it’s time to add other natural elements. This step is entirely optional, but including other natural elements in your Fairy Garden can really step-up your design. Since I have a valley in-between my two foundational plants, I thought a river stone path would look nice.


The stones are particularly nice because they add a lot of color contrast in comparison to the plants and soil. However, if you aren’t a fan of the stones, wood-chips would also work well. If you were going for a more whimsical vibe, marbles, sea glass, or colored pottery shards might be neat too. Anyway, lightly pour your material of choice into a path/landing pad. When you are satisfied with your natural accessories move on to the final step…

Step 6:
Finally, the end is nigh! (But in a “wasn’t this so much fun?!” kinda way). This last part is the most fun because it involves shopping for garden accents!


As you can see, the Greenhouse alone has many different fairy accents to choose from. There are the expected fairies, gnomes, and mushrooms, but there are also trellises, bridges, and furniture. I decided to keep my Fairy Garden plant-focused and chose a very natural-looking wrought iron fairy. She seemed like the perfect size to me.
One I had her location picked out I quickly realized she was a little too heavy to stand on my stone path, but I was able to avert crises by taking a tiny terracotta pot and shoving it upside down into the soil. My little fairy sits perfectly on her little stand, and I don’t need to be worried about her sinking into the landscape.


So there you have it, that was the creation of my Fairy Garden, hopefully you are inspired to get yours done too! If this six-step guide was a little too daunting, my Fairy Garden can be purchased at the Greenhouse for $42. Additionally, a custom Fairy Garden could be requested if you so desired.


I hope you enjoyed this week’s adventure at Stratton’s Greenhouse!

Be sure to follow us on...

Thursday, April 25, 2013

Herb Series: Entry 1

Starting an Herb Garden...


Typically, as we head toward May we begin to envision blooming flowers, warm breezes, fresh fruits and vegetables, and cooking with fresh herbs. I am choosing to hold this imagery firmly in my mind despite the terribly dismal temperatures we have been forced to endure as of late. And as a result, I have decided to dedicate this entry to herbs…


Growing your own herbs is a terrific way to add diversity and interest to your garden. Herb gardens produce at a rapid rate, and they are fairly easy to maintain. They are great indoors (provided they have access to sunshine) and outdoors, which means fresh seasonings all year round.


When planting an herb garden, I prefer small (4in.-6in.) pots. These small pots would ideally house basil, thyme, parsley, and oregano. Larger pots work well for herbs that maintain good flavor after maturity; including bay, sage, and rosemary. Cilantro (coriander) grows best when planted outside in the garden; it likes a lot of room to grow. Herbs like mint and chives will come up every year and can be planted in pots, vegetable gardens, or even incorporated into landscape design. However, these herbs do need a great deal of supervision as they will attempt to take-over the bed.

Many herbs can be planted outside in the garden alongside vegetables as companion plants. Companion planting is a method of planting that demonstrates how some plants can do better with others beside them. Typically, companion plants don’t compete for the same nutrients and can enhance the health of each plant. A few very successful combos include: basil and tomato (no surprise there), parsley and asparagus, and chives and carrots. This website is a great source for deciding which companion plantings would be right in your garden.

Whichever planting method you choose, be sure to wait until the plant has enough leaves to sustain growth after each cutting.  Once herbs have hit their growing peak they can be trimmed quite frequently. This is great later in the season since extra trimmings means a chance for drying your own herbs!


I hope this entry was an insightful look at herbs and their awesomeness! If you are ready to get your herb garden started, head on out to the greenhouse. We have all the herbs I mentioned (plus a few more) ready to go! Also, I couldn't resist posting one of Susie’s favorite recipes... her amazing pesto! She makes this dish with fresh basil straight from her garden, and now you can too!


Susie’s Pesto:
-Start with plenty of basil, at least 2 cups tightly packed
-Next, you will need garlic, 2 cloves is a good starting point
-Then, you will need pine nuts, for those of you who aren't sure about pine nuts you can check them out here, ¼ of a cup should do
-And finally, just a little olive oil (start with ½ cup)!

You can combine the basil, garlic, and pine nuts in a food processor or finely chop them by hand if you prefer (this will take quite a bit of time). After the aforementioned ingredients have been combined, add in your olive oil…
And that’s it. You are done! Susie will sometimes add a little fresh parmesan cheese for an added kick.


**the one thing to keep in mind with this recipe is everything is combine to taste, so there is a lot of room to play with this fresh-herb concoction**


Be sure to follow us on...

Saturday, April 13, 2013

Are You Ready to Get Your Hands Dirty?


Well the warm weather has finally arrived (today aside) and its time to get out there and enjoy our gardens. And right now is the perfect time to get your cold-weather vegetables into the ground. Cold weather vegetables include broccoli, cabbage, lettuce varieties, kohlrabi, and cauliflower. Now each plant has its own specific set of growing requirements (something to keep in mind as the weather gets progressively warmer), but these plants do share a similar planting season—early spring, generally a few weeks before the last frost hits. This year, this means right now.

So if you can brave the re-surge of cold temperatures, this weekend would be a great time to break out your gardening gloves and get some early plantings in.

And we have all the cold weather vegetable varieties I mentioned…


 plus a few more…


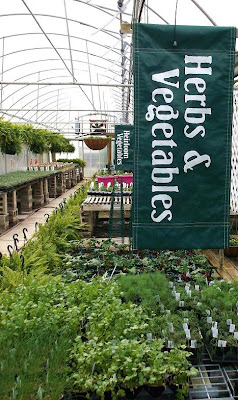
here at the Greenhouse!

 Also, if you have any questions (maybe regarding the specific set of growing requirements I mentioned earlier) please post them in the comments, I’m here to help after all!


Be sure to follow us on...

Friday, March 29, 2013

Just in Time for Easter...


Well as you all know, we have been far from enjoying the spring weather typical of this time of year. Even out here at the greenhouse we are feeling a little dejected over it. But there is something that would undoubtedly cheer us all up… seeing your shining face at our door! That’s right, despite this gloomy weather, we will be officially opening our doors on Monday the 1st of April! We will be open from 10 a.m.-5 p.m. Monday through Saturday.

With that in mind, I thought I’d take a moment to show off a few of my favorite new products we have in store.

The first one is a shout-out to all the pinterest obsessed out there (myself included). I’m sure you have all noticed the endless pins dedicated to succulents. They are literally everywhere; in wreaths, wedding bouquets, even corks?!


And they are here at the greenhouse U+2193.svg


Succulents are so gorgeous in their understated complexity. These hardy little plants are finally getting the recognition they deserve, and I imagine they will fly off the shelves.
 A side note for you plant killers, succulents are incredibly hardy plants that can withstand immense amounts of torture, so don’t be afraid by their delicate appearance, this might just be the plant family for you.

Next on my list of favorite items is this rain water collectors:


Finally the conservation wave is catching on, and conserving rain water is a great way to get involved! And even if conservation isn't your thing, I think this is something every green-thumb can appreciate since we all know what it’s like to see our water bill spike in the summer months. My favorite rain collecting option is the recycled wine barrel. I love the rustic, yet chic vibe it gives off.  But if you prefer something a little more streamline, there are plastic options available too.

And finally, an accessory every woman needs, a fabulous purse!
These moss-covered purses are so awesome. In the following pictures I have illustrated just a few of the ideas that came to mind when I first got my hands on them.


My table-scape was created with 2 of the moss purses, a few river stones, some tea lights, and a potted orchid. Not bad for a snowy day…

This next picture has a few silk flowers in it for those of you who want an arrangement that is care-free and colorful all year round.

And finally, in the last picture I have planted pansies and begonias in a few purses. While they may not look like much now, give ‘em a month or so and they will reveal a bounty rivaled only by the purse belonging to the mother of a two-year-old…

So now you've seen a preview of my favorite new items, hopefully it has enticed you enough to brave the cold weather. Will we see you April 1st?

Also, as of now the almighty weatherman is forecasting a beautiful Easter weekend for us… Regardless of what Mother Nature dictates, we would like to wish you a very Happy Easter!

Be sure to follow us on...

Thursday, March 14, 2013

Bringin' it Back


Happy almost Spring Everyone!

You may have noticed that we were away from our old blog for quite some time, (you can blame that on technical difficulties,) but we are back and ready for all the questions, conversation, and theories you can muster. We have changed our blog name, and site, so make sure you permanently bookmark us!

Just like our last blog, this page will always be written by a dedicated and learned Stratton’s employee, (which employee may remain a mystery,) and is fully capable of answering your questions. We hope you will always think of us if you find yourself lost in the gardening world, or even in your garden.

You’ll find that this time around we will be sharing a great deal more. This includes the day-to-day processes we go through at the greenhouse, the seasonal trials we face, and we will even be bringing you on our journeys outside of Bluffton, think Columbus, Washington D.C., and even California… Am I teasing you? Indeed I am.

For now, let me leave you with a little pop of color showing up in the greenhouse:


 And while we are not yet open for your spring shopping, rest assured, we are very busy getting ready for your arrival!

Be sure to follow us on...